If rodents have been living in your attic insulation, the material usually has to come out. Droppings, urine, and nesting debris turn attic insulation into a biohazard that no amount of topping-up can fix. Contaminated blown-in cellulose or fiberglass also compresses and mats down, cutting R-value by 30 to 50 percent in heavily infested areas. For a San Diego attic that should be hitting R-38 to R-49, that’s a significant performance loss on top of the health issue.
This post covers why contaminated insulation can’t just be treated in place, what the safe removal process looks like step by step, and what the work costs here. If you’re still deciding whether your situation actually requires removal, start with our guide to insulation removal: when you actually need it. If cost is your primary question, see our attic insulation removal cost breakdown.
Why rodent contamination isn’t a spot-clean problem
Mice and rats don’t just sit in one corner. They travel the entire insulation layer, using it as a highway, a nesting site, and a bathroom. By the time you see visible evidence, the contamination is typically spread across a large area, often the whole attic floor.
Urine soaks deep. Rodent urine wicks through loose-fill insulation quickly. The dried residue is invisible but remains biologically active. Hantavirus, a serious respiratory illness, is carried in the urine, droppings, and saliva of infected deer mice. The risk is highest when dried material gets disturbed and airborne. San Diego County does have confirmed deer mouse populations, particularly in foothill and east county areas.
Droppings accumulate fast. A single mouse produces 50 to 75 droppings per day. A small colony of 10 mice running through a 1,500 sq ft attic for a few months leaves behind tens of thousands of droppings throughout the insulation layer.
Nesting destroys R-value locally. Rodents compress and shred insulation to build nests. The compressed zones have near-zero thermal resistance. You can’t see this from the attic hatch, but a thermal imaging scan or a physical depth check reveals it.
Odor doesn’t go away. The ammonia from dried urine and decomposing organic material doesn’t dissipate on its own with adequate ventilation. It continues off-gassing into living areas through gaps in the attic floor sheathing.
Sanitizing sprays applied over contaminated insulation reduce surface bacteria but don’t penetrate to the depth where the real contamination lives. That’s why removal is the standard approach once infestation is confirmed.
The safe removal process, step by step
Rodent-contaminated insulation falls under biohazard handling protocols. Here’s what a proper job looks like.
| Step | What happens | Why it matters |
|---|---|---|
| 1. Inspection and scope | Contractor assesses attic visually and documents contamination extent, insulation type, and any vermiculite or other hazardous materials | Determines whether removal is full or partial; identifies any scope that requires a licensed abatement contractor |
| 2. Entry-point identification | Exterior of home is inspected for gaps, soffit damage, and unsealed penetrations | Removing insulation before sealing entry points means re-infestation within months |
| 3. Containment setup | Attic hatch covered with plastic sheeting; HEPA-filtered vacuum connected to exterior disposal bag; workers in Tyvek suits, N95 or P100 respirators, and gloves | Prevents contaminated dust from entering living space during extraction |
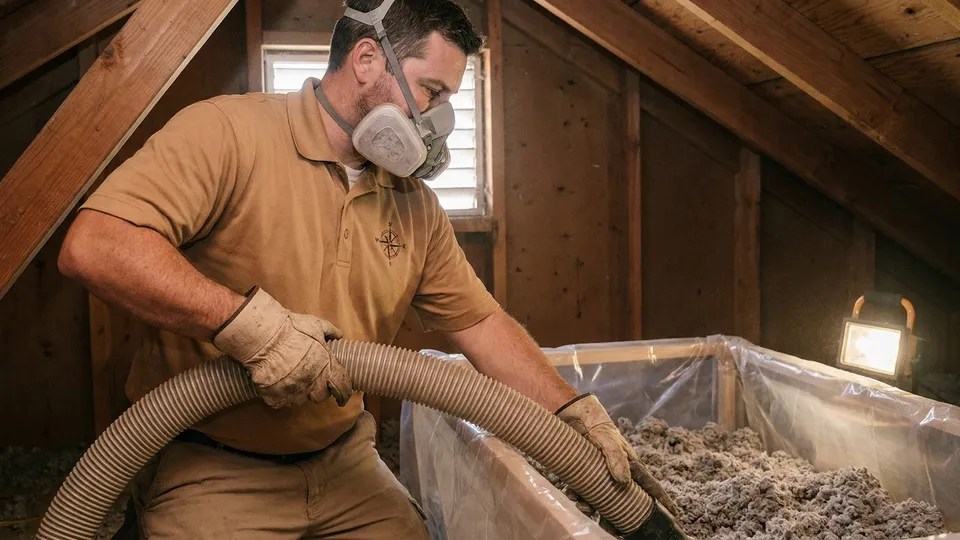
| 4. HEPA vacuum extraction | Contaminated insulation vacuumed into sealed disposal bags in segments | HEPA filtration captures particles down to 0.3 microns, including dried rodent urine particulates |
| 5. Debris removal | Nesting material, droppings, and carcasses bagged and removed | All material treated as biohazardous waste per county disposal guidelines |
| 6. Surface sanitizing | Attic floor sheathing, joists, and rafters treated with EPA-registered disinfectant | Kills remaining bacteria, reduces residual odor |
| 7. Air sealing | Gaps at top plates, around penetrations, and at soffits sealed with spray foam or caulk | Critical step before reinsulating: prevents both re-infestation and air leakage |
| 8. Reinsulation | New blown-in cellulose or fiberglass installed to current R-value target (R-38 to R-49 for most SD County climate zones) | Restores thermal performance with clean, uncontaminated material |
| 9. Entry-point repair | Any structural gaps on the exterior sealed with metal mesh, hardware cloth, or foam | Long-term solution; spray foam alone is not sufficient because rodents chew through it |
The containment and HEPA extraction steps are the ones that separate a real biohazard removal from someone with a shop vac doing a quick cleanup. If a contractor isn’t suiting up and running filtered extraction to the exterior, the work isn’t safe for the occupants or the workers.
Air sealing: the step homeowners most often skip
Removing contaminated insulation and putting fresh material back in without sealing entry points is the most common mistake we see in callbacks. New insulation does nothing to stop the next wave of rodents. Within a season, you’re often back to the same problem.
Air sealing is also the highest-return step in the whole job from an energy standpoint. San Diego homes, particularly those built before the 1990s, often have significant air leakage at top plates, around recessed lights, at plumbing and electrical penetrations, and along the attic floor perimeter. Sealing those gaps before reinsulating means the new R-49 attic actually performs at R-49 rather than being bypassed by air movement.
Our practice is to include air sealing in every insulation removal and reinstall project. It’s not an optional add-on.
What rodent-damaged insulation removal costs in San Diego
Cost depends on attic size, contamination severity, and what follows the removal. The ranges below are typical for San Diego County residential projects.
| Scope | Typical cost range | Notes |
|---|---|---|
| Removal only, light contamination | $1,500–$2,500 | Smaller attic, localized evidence, no major nesting |
| Removal only, moderate contamination | $2,500–$4,500 | 1,000–1,500 sq ft attic, widespread droppings, some nesting |
| Removal only, heavy contamination | $4,500–$7,000+ | Large attic, significant nesting debris, heavy odor |
| Air sealing (added to removal) | $500–$1,500 | Depends on number and size of penetrations |
| Reinsulation to R-49 (blown cellulose) | $1,400–$2,800 | Varies by attic sq ft and access |
| Entry-point repair (exterior) | $200–$600 | Depends on number of gaps and repair complexity |
These are typical ranges, not guarantees. The most accurate number comes from a physical attic inspection, because contamination extent and attic geometry vary too much to quote accurately over the phone.
For a detailed breakdown of how these cost factors stack up, see our attic insulation removal cost guide.
What you get back
Once the attic is clean, sealed, and reinsulated, a few things change immediately:
R-value returns to spec. New attic insulation installed to R-49 in a coastal San Diego climate zone performs consistently, without the compressed dead zones the infestation left behind.
Odor stops. With the contaminated material gone and the surfaces sanitized, the ammonia and organic odor that was seeping through attic penetrations into the house typically clears within a few days.
HVAC works less. A properly insulated and air-sealed attic is one of the highest-impact changes for reducing SDG&E cooling and heating bills. California’s Title 24 sets minimum R-values for good reason: the performance difference is measurable on the utility bill.
Peace of mind. Knowing the attic is clean and sealed changes how homeowners think about their attic space and their indoor air quality.
What doesn’t require full removal
Not every rodent problem means a full tear-out. If you found a single nest near the hatch and evidence is limited to one area, a partial removal might be appropriate. If the insulation is otherwise in good condition and contamination is genuinely localized, we’ll say so. We don’t remove insulation that doesn’t need to come out.
The distinction is inspection-dependent. What looks minor from the attic hatch is often more widespread than it appears once someone is actually moving through the space.
When to call us
If you’re seeing droppings on the attic floor, smelling ammonia in upper-floor rooms, or have had a pest control company confirm rodent activity in the attic, an inspection is the right first step. We’ll tell you whether the contamination warrants full removal, partial removal, or whether you can get away with targeted cleanup plus fresh insulation on top.
We also coordinate with pest control companies if rodent exclusion hasn’t been done yet. The sequence matters: exclusion first, then removal and reinsulation.
To schedule a free attic inspection, reach us at our contact page or call (858) 925-5546. We serve all of San Diego County, from coastal Chula Vista to inland El Cajon, with the same crew and the same process on every job.